Openstack
This class will be utilizing an Openstack cluster for various assignments throughout the term. This provides a fast and stable platform for students instead of relying on a powerful laptop to run local virtual machines. Openstack is basically an opensource solution that mimics public clouds such as AWS and Rackspace Cloud. It provides a web frontend and APIs to create and destroy virtual machine resources quickly. We have created a private Openstack cloud hosted at the OSL specifically designed for this class.
Requirements
The requirements for using the cluster are very small.
- An account on our cluster (We’ll create this for you, contact us if you don’t have access yet).
- An ssh client and a set of public and private ssh keys
- Access to the OSU network
Ground Rules
This cluster has a few ground rules because we’re using it for class use only.
- The virtual machines will only be accessible via the OSU network. If you want access from the VMs from off campus, please use the OSU VPN. If you have any trouble connecting to the VMs, please let us know.
- Please follow the OSU Acceptable Use of University Computing Resources
- Do not attempt to login to other machines without explicit permission
- Do not do anything illegal (no torrenting)
- Do not attempt to disrupt other machines or services (no DOS/DDOS)
- Use common sense. If you would get mad at something done to you, don’t do it to others
- Ken Thompson gave an interesting talk on trust. Read it.
Some notes on Openstack
The Openstack environment is cloud environment which means you treat the virtual machines as resources that can go away and be deleted easily and recreated. So please be careful keeping any classwork on the virtual machines. Make sure you always keep a local copy and treat the VMs as a temporary resource.
In addition, each time you destroy and create a new virtual machine, it will likely assign you a different public IP.
Logging into the site
Goto https://studentcloud.osuosl.org and login using the credentials we gave you in class.
Change your password
On Linux or OSX, install python-keystoneclient with pip:
$ pip install python-keystoneclient
Then use keystone to change your password:
$ keystone --os-username <username> --os-password <your id> \
--os-auth-url http://studentcloud.osuosl.org:35357/v2.0/ \
password-update --new-password <new password>
DO NOT Use a password you have used elsewhere
If you’re using Windows, spin up a VM on Openstack, then follow the above instructions.
Make sure you change your password. Goto Settings -> Change Password.
Add your ssh key
- Please follow the SSH Keys Howto guide on how to create ssh keys.
- Next, go to
Project -> Compute -> Access & Security -> Key Pairs.
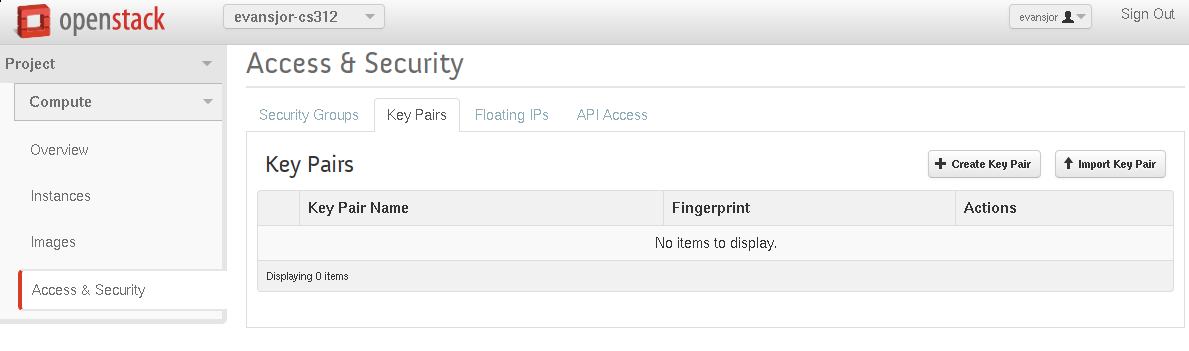
- Click
Import Key Pair
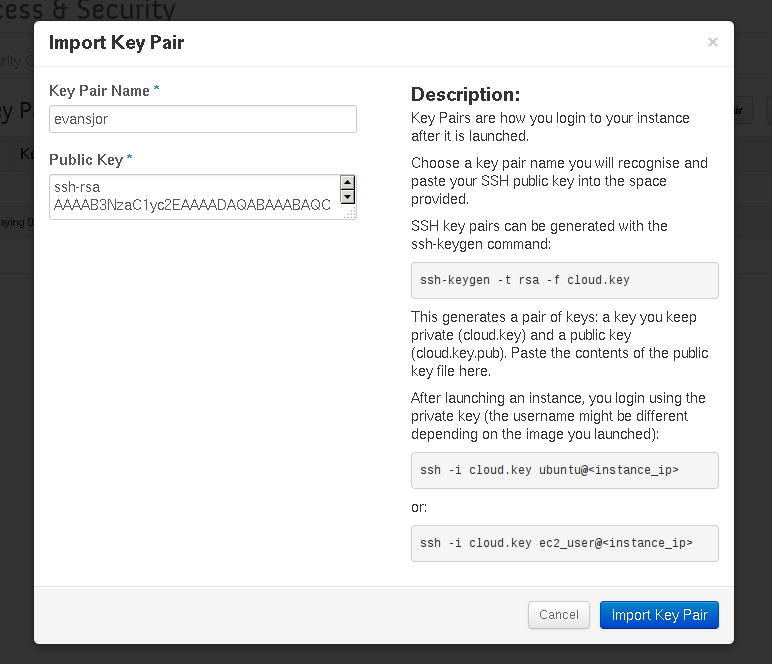
- Type a short name for your key (onid id is a good one for now) in the
Key Pair Namefield. - Copy and paste your public key (not your private key!) in the
Public
Key
Field. - Click
Import Key Pairto add it to the system. - After you add the key, it should bring you back to a page like this.

Creating a Virtual Machine
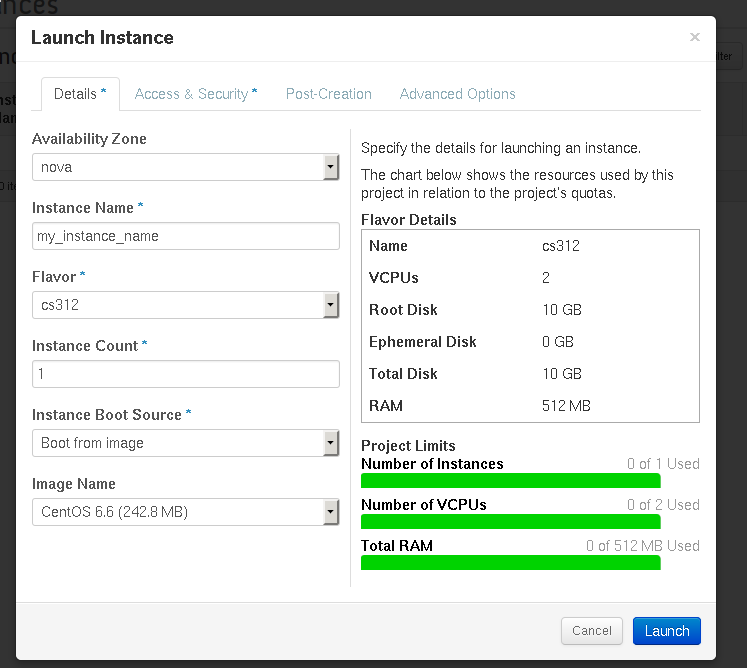
- Go to
Project -> Compute -> Instances

- Fill out the form using the following defaults, and then click
Launch:
- Availability Zone: nova
- Instance Name: <name of your choosing>
- Flavor: cs312
- Instance Count: 1
- Instance Boot Source: Boot from Image
- Image Name: CentOS 6.6
- It should bring you to this page and show you the progress of the VM.
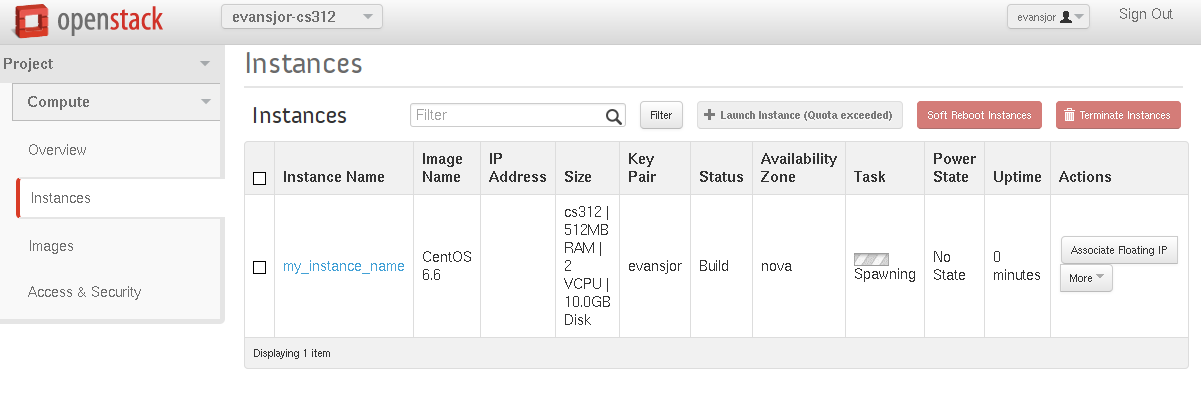
4. If all goes well you should see two IP addresses in the IP Address
column, one 192.x.x.x the other is the public IP which should be
140.211.168.x. Remember that IP as you’ll need it to connect to the virtual
machine.
Connecting to the Virtual Machine
Either using PuTTY or an ssh client of your choice, use your ssh key and connect
to the host. By default the user you connect as will be centos. So for
example, if the public IP is set to 140.211.168.76, you would do the
following:
$ ssh centos@140.211.168.76
The centos user has full sudo privileges so simply just type sudo su -
to get to root level access.